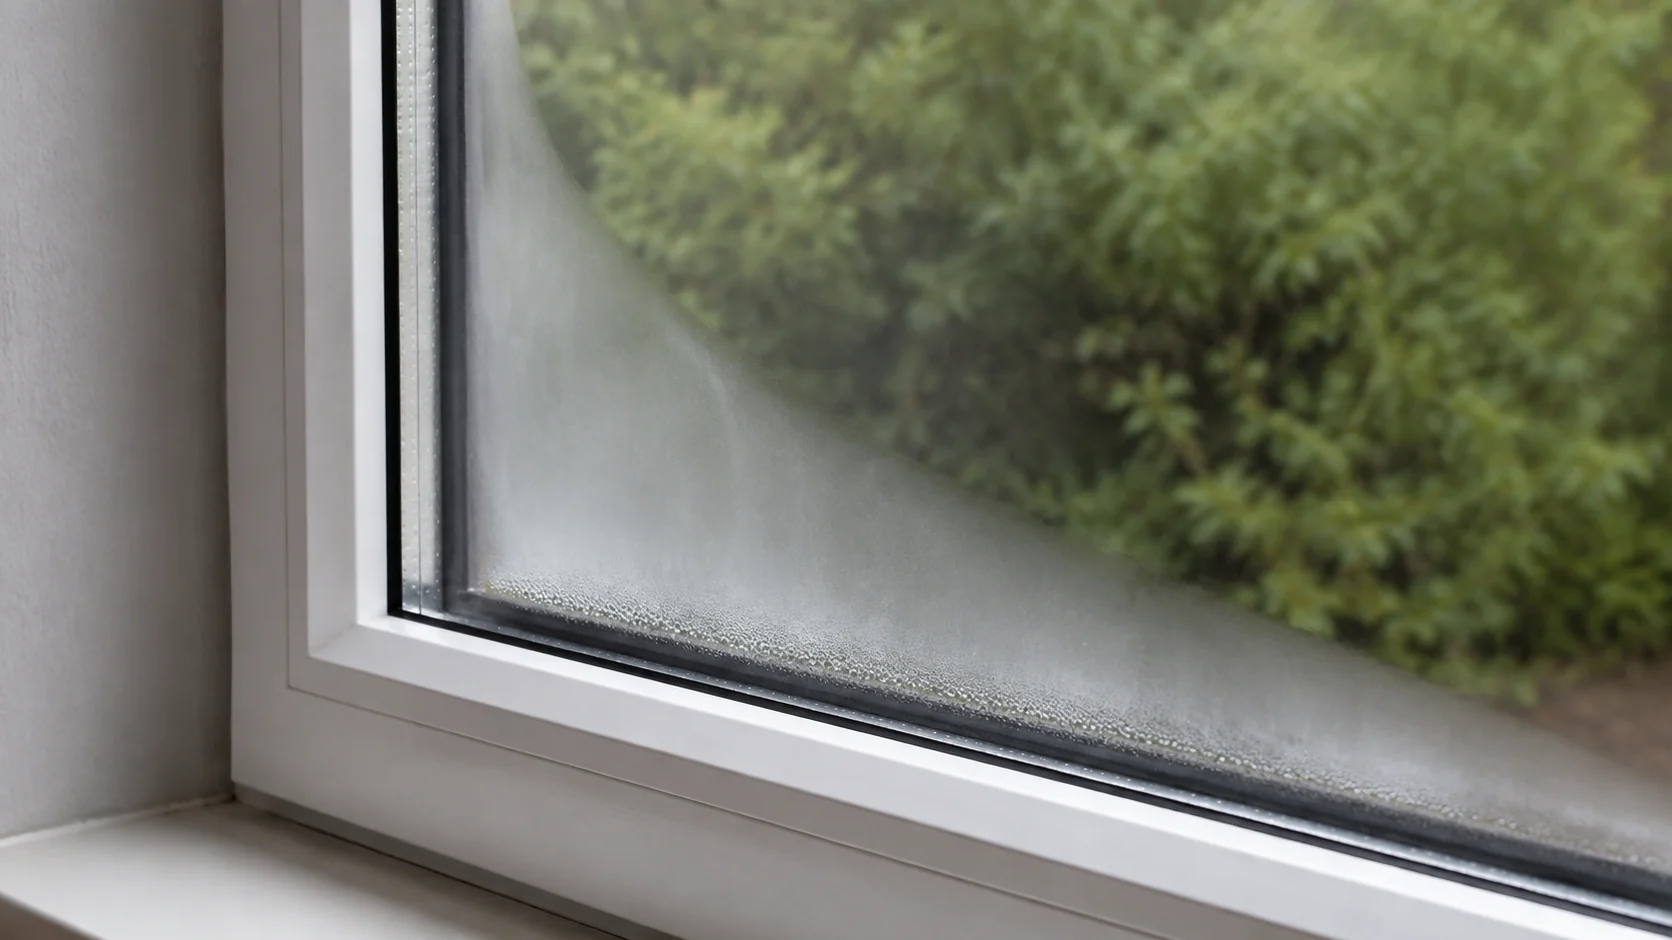
Window condensation between panes usually means the seal around an insulated glass unit has failed. Wipe the room side and the outdoor side of the glass first. If the milky patch or droplets remain behind both surfaces, lowering indoor humidity won’t repair that sealed cavity; check the warranty, then replace the glass unit, the sash, or the whole window according to the condition of the parts around it.
Don’t accept a full-window quote from the fog alone. A sound frame may only need a new insulated glass unit, often shortened to IGU. A warped, rotten, leaking, or inoperable frame is a different job.
Start here: clean both reachable faces, take one photo from the same angle on two different mornings, and test whether the sash opens, closes, and locks. Those observations separate a glass failure from indoor humidity and from a wider window problem.
Why the fog sits where you can’t clean it
A double- or triple-pane window isn’t made from loose sheets of glass. The panes, edge spacer, sealants, and dry cavity form one factory-sealed insulated glass unit. Once moisture enters that cavity, the visible haze may change with outdoor temperature, but wiping the room does nothing because the affected surface is sealed inside.
Natural Resources Canada separates window condensation by location. Moisture on an exposed glass face can come from humid air touching cold glass. Moisture between panes indicates a broken seal, and its stated remedy is replacement of the insulating glass unit. The useful distinction isn’t how wet the window looks. It’s whether you can touch the wet surface.
A dehumidifier can reduce room-side droplets. It can’t refill a sealed cavity. Exterior caulk seals the joint around the opening, not the perimeter seal between the panes. Treating all three as one seal is how a cheap fix turns into repeat work.
So find the physical layer first. If the haze wipes away, the job is humidity and air movement. If it stays inside the glass, move on to the unit, sash, and warranty checks below.
Window condensation between panes 3-minute location test
Use this short test in daylight. You aren’t trying to measure energy loss or identify the sealant chemistry. You only need enough evidence to describe the failed component accurately.
- Clean the room-side glass. Use your normal glass cleaner on a small section across the edge of the haze. Dry it fully so a surface film doesn’t confuse the result.
- Check the outdoor face safely. Clean it only if you can reach it from the ground or through the window without leaning out. Skip this step on upper floors and ask a glazier to confirm the location.
- Change the viewing angle. Look across the glass from the side, then shine a light across it after dusk. A film sealed behind a clean reflection will stay visible.
- Repeat once after the weather changes. Surface condensation often clears as temperature or room humidity changes. Fog inside a failed unit may fade too, but it returns in the same inaccessible cavity.
- Photograph the evidence. Capture the whole sash, the fog pattern, the spacer at the glass edge, and any product label. Don’t dismantle the sash to find a number.
Stop if the window is cracked, the sash feels loose, or reaching the exterior would require a ladder. The test is visual. It doesn’t require drilling a vent hole, opening the glazing pocket, or scraping the spacer.
If the moisture is actually on the indoor face, inspect room humidity and airflow before ordering glass. Closed blinds, deep sills, and furniture can limit warm air movement across a cold window. That finding changes the action: manage the room condition first, then see whether exposed condensation returns.
Choose the glass, sash, or whole window
The failed seal is part of the IGU, but manufacturers assemble windows differently. A local glass shop may be able to replace the sealed glass inside a sound sash. Some manufacturers supply a complete replacement sash instead. Full-window replacement removes the frame from the opening and reaches trim, flashing, and the wall connection, so it should solve more than foggy glass.
| What you find | Scope to ask about first | Reason |
|---|---|---|
| Frame is dry, square, and solid; sash operates normally | IGU replacement | The failed sealed glass can be the only defective assembly |
| Frame is sound; operable sash is damaged or the maker supplies it as one part | Replacement sash | Glass and moving sash can be renewed without disturbing the wall opening |
| Frame or sill is soft, warped, leaking, or no longer locks | Full-window assessment | New glass won’t repair a failing frame, hardware, or wall joint |
| Fog appears in several units from the same purchase | Warranty claim before paid work | The maker may require labels, photos, and an inspection before authorizing parts |
Pella’s current window FAQ also identifies between-pane condensation as a usual sign of glass seal failure. It says the broken seal can’t be effectively repaired and that the window or insulated glass unit typically needs replacement. That “or” matters. It leaves the scope open until someone checks how your exact window is built and whether the surrounding assembly is still serviceable.
My recommendation is to ask for an IGU assessment first when the frame is sound. Don’t approve full replacement merely because the view is cloudy. At the other extreme, don’t put new glass into visibly decayed wood or a sash that won’t lock; the smaller invoice would leave the larger defect in place.
The ENERGY STAR window guidance lists cloudy or wet space between double panes as one reason replacement may be due, but it also calls out drafts and degraded sills or sashes. Read those as separate observations. Fog confirms a sealed-glass problem; frame decay and air leakage are what justify widening the job.
Check the warranty before a contractor removes anything
Find the manufacturer and product identifier before booking paid work. Look along the spacer between the panes, the top or side of an operable sash, the lock rail, or the original invoice. Photograph what you find instead of rubbing or scraping faint printing.
Then open the warranty for the exact product line and installation date. Don’t rely on a current sales page for a window bought years ago. Confirm four items: whether seal failure is covered, whether coverage transfers to a later homeowner, whether labor is included, and whether the maker must inspect or approve the claim before repair.
That last item changes the real bill. A warranty may supply the glass unit while leaving removal, installation, travel, and disposal to you. Ask the maker what it ships, then ask the installer to price the rest separately.
Don’t drill the glass or approve a cosmetic “defogging” step before making the claim. Clearing visible moisture isn’t the same as recreating a factory-sealed unit, and an alteration can complicate coverage. Start at the manufacturer’s warranty library or the equivalent page for the name on your label.
When the fog is not the only problem
Water on the sill, peeling paint, or damp drywall isn’t proof that moisture traveled out of the sealed glass cavity. It can point to exterior drainage, flashing, perimeter sealant, or a leak above the opening. A glass-only repair won’t correct water entering around the frame.
Test the window’s basic operation without forcing it. Does it open evenly, stay in position, close fully, and lock without lifting the sash by hand? Press wood gently with a fingertip rather than a sharp tool. Note softness, swelling, open joints, damaged weatherstripping, and staining around the opening.
If any of those appear, ask for a window and wall-opening assessment, not just a fogged-glass quote. The home installation guide uses the same boundary: identify the surface, opening, load path, and exact model before choosing a method. Here, the equivalent is glass unit, sash, frame, and wall connection.
One isolated failed unit in an otherwise sound set doesn’t prove every window needs replacement. Several failures, hard-to-operate sashes, and decayed frames support a broader estimate, but compare them opening by opening. If complete replacement is justified, use the NFRC label to compare U-factor, solar heat gain, visible transmittance, and condensation resistance for your climate. A higher condensation-resistance number means the rated product better resists surface condensation; it doesn’t promise that a damaged seal will heal.
Make every contractor quote the same repair
Ask at least two providers to price the same three scopes where available: sealed glass only, complete sash, and full window. Each quote should identify the glass configuration, coatings or grids to be matched, labor, interior and exterior finishing, disposal, lead time, and written warranty. A single total gives you nothing useful to compare.
Send the same photo set to each provider: the whole window, close-up haze, glass-edge spacer or label, frame corners, sill, and any wall staining. State whether the window opens and locks. This is the window version of the one-change-at-a-time method in the smart home troubleshooting guide: keep the evidence fixed so the proposed fix is the variable.
Open your camera now. Photograph the label, the full sash, and the window condensation between panes, then clean both reachable faces. If the haze remains inside and the frame operates normally, request an IGU quote before discussing full-window replacement.

Bolt & Bulb covers what goes wrong after the unboxing: devices that drop off Wi-Fi, dimmers that flicker with LED bulbs, locks that will not fit a rental door. The site draws on manufacturer documentation, platform support pages and release notes, and attributed owner reports in public forums.